
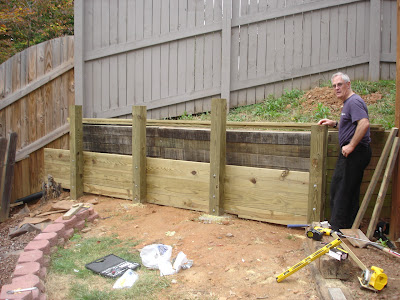
 A better view of the weight bearing post and the angle of the wall.

A close-up view of the drain I put in. The right side extends slightly beyond the corner and should catch most of the water that pours through.

After placing the drain the next step is to place 16 foot boards behind the 6X6 posts. The bottom board is a 2X6 and to level it we had to cut a chunk of the board out around the cement of the 2nd post. Not only will this help level the board it also brings it closer to the ground so there aren't large gaps at other points as the ground is not level.

We decided to use hex bolts rather than lag screws. These are 3/8in X 8 in. These bolts are not the source of strength, they are really just necessary to hold the boards in place.

Board #2
Board #3
 Board #4
Board #5

The problem corner. We had to find a way to fill this open end for both aesthetic reasons and structural. I am also planning on filling the gap between the old wall and the new wall with gravel, most likely 1.5 inch. I am also planning on taking off at least the top row of the old wall. The gravel should help water flow down to the drain.

The Solution. We cut a 4ft 2X10 to fit the space as best we could. We had to take it to a local cabinet maker to do the cut and then used my neighbor's handheld jigsaw to angle the edge. We then cut a strip of the 2X10 and bent it and attached it next to the triangular shaped piece. This was to hide the imperfections in the curved cut. Because the boards on the wall do not line up and it is bowing out it is impossible for it to fit perfectly.
I think it looks good (the picture may not do it justice) and it also serves to prevent the gravel from falling out.

A view of the problem corner from the top with the 2X10 strip on the right and the specially cut piece on the left.

The other issue is reattaching the fence to the new wall.
 The solution was to screw a 4x4 post from the old fence into the boards and attach 2x4's so that the vertical fencing can be attached. This way we also don't have to worry about cutting the 16 ft boards because the ends sticking out will be behind the fence.
A few selected images of the completed wall. The next step is to cut the top of the posts level with the wall, back fill the gap with gravel, and I am thinking about putting some extra drainage behind the old wall. Another thing I am considering (a suggestion from Duane) was to take the entire grassy area abutting the wall and put in a brick patio. It would be much cleaner with less weeds. It would be continuous with my brick walkway and I think it would look sharp.

